2011年 2月 1日 掲載
今回から,使用する GMT のバージョンを 4.5.5 に上げました. 4.5.3 では,最後の図がうまく描画できません.
psxyコマンドの -Sfオプションのつづきである. 今回は,前線に描く記号をいろいろ変えてみる.
まずは,man psxy をもう一度読んでみよう.
-Sf    front.   -Sfgap/size[dir][type][:offset].   Supply  distance gap
       between symbols and symbol size.  If  gap  is  negative,  it  is
       interpreted  to  mean  the  number  of  symbols  along the front
       instead.  Append dir to plot symbols on the left or  right  side
       of  the  front  [Default  is  centered].  Append type to specify
       which symbol to plot: box, circle,  fault,  slip,  or  triangle.
       [Default  is  fault].   Slip means left-lateral or right-lateral
       strike-slip arrows (centered is not an option).  Append  :offset
       to  offset  the  first symbol from the beginning of the front by
       that amount [Default is 0].
描画できる記号は,box,circle,fault,slip,triangle の 5種類から選べるようだ.
では,さっそく box(四角)から. -Sfオプションに「b」をつけると,記号が box になる. サンプルデータは,前回作った円弧のデータ arc.txt を使おう.
$ awk 'BEGIN{for(x=0;x<=5;x+=0.125)print x, sqrt(25-x**2)}' > arc.txt
$ psxy arc.txt -Jx1 -R-1/6/-1/6 -Sf1/0.5b > front.eps

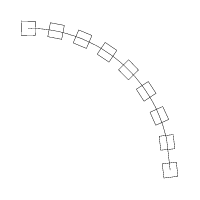
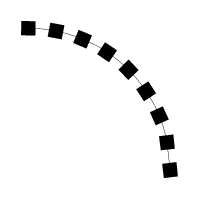
あれ?ただの円弧だ. box を描画するためには,-Wオプションで線種を指定するか, -Gオプションで塗りつぶすかしなくてはならないのだ.
$ psxy arc.txt -Jx1 -R-1/6/-1/6 -Sf1/0.5b -W1 > front.eps
$ psxy arc.txt -Jx1 -R-1/6/-1/6 -Sf1/0.5b -Gblack > front.eps
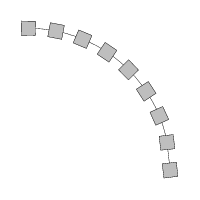
-Wオプションと -Gオプションを併用することも,もちろんできる.
$ psxy arc.txt -Jx1 -R-1/6/-1/6 -Sf1/0.5b -W1 -Ggray > front.eps
次は,circle(円).-Sfオプションに「c」をつける.
$ psxy arc.txt -Jx1 -R-1/6/-1/6 -Sf1/0.5c -Gblack > front.eps
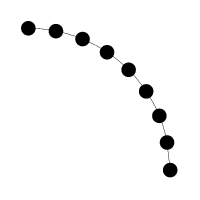
次,fault(断層).「f」をつける. これが,front のデフォルトの記号である. fault を指定する場合,-W,-Gオプションは必要ない. 断層が曲線ってのも変な感じなので,直線のデータ line.txt を作った.
$ echo 0 5 > line.txt
$ echo 5 0 >> line.txt
$ psxy line.txt -Jx1 -R-1/6/-1/6 -Sf1/0.5f > front.eps
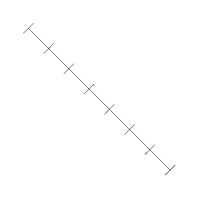
次,slip(横ずれ断層).「s」をつける.
$ psxy line.txt -Jx1 -R-1/6/-1/6 -Sf1/0.5s > front.eps
psxy: Error in Option -Sf: Must specify (l)eft-lateral or (r)ight-lateral slip
エラーが出てしまった.slip を描画するときは,ずれの向きも指定する必要がある. 左横ずれ断層は「ls」,右横ずれ断層は「rs」とする (「sl」「sr」では、違う意味になるので注意).
$ psxy line.txt -Jx1 -R-1/6/-1/6 -Sf1/0.5ls > front.eps
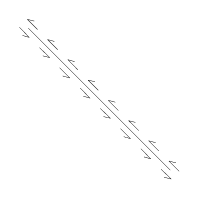
$ psxy line.txt -Jx1 -R-1/6/-1/6 -Sf1/0.5rs > front.eps
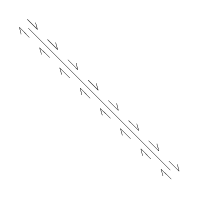
最後は triangle(三角)である.「t」をつける.
$ psxy arc.txt -Jx1 -R-1/6/-1/6 -Sf1/0.5t -Gblack > front.eps
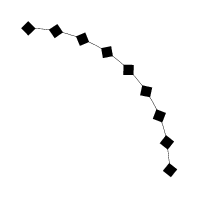
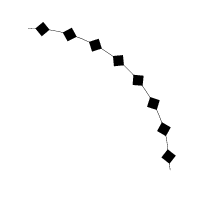
front の記号は端から描かれていたが, 描画開始位置を途中からにすることもできる. -Sfオプションの最後に「:(コロン)」をつけて,オフセット値を指定する.
$ psxy arc.txt -Jx1 -R-1/6/-1/6 -Sf1/0.5t:0.5 -Gblack > front.eps
最後に,使用例を.
$ awk 'BEGIN{for(x=0;x>=-5;x-=0.125)print x, 5-sqrt(25-(x+5)**2)}' > arc2.txt
$ psxy arc.txt -Jx1 -R-6/6/-1/6 -Sf2/0.3lc:1 -W2,red -Gred -K > front.eps
$ psxy arc2.txt -J -R -Sf2/0.5lt:1 -W2,blue -Gblue -O >> front.eps
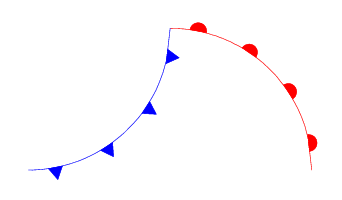
半円と三角で,温暖前線と寒冷前線を描いてみた.
[ KDOホームにもどる] [ いちからはじめる GMT インデックスにもどる ]
(C) 2011 KDO