2011年 7月 1日 掲載
その40 のメルカトル図法から 5ヶ月,ずっと地図の投影法をあつかってきたが, ここらで気分を変えて,別の記事を書くことにしたい. 今回は,ひさしぶりに psxyコマンドのオプションをあつかうことにする.
psxyコマンドでは,-Sオプションでいろいろなシンボルをプロットすることができるが, -Skオプションを使うと,自分で作ったオリジナルのシンボルを使うことができる. まずは man psxy の -Sk の項を読んでみよう.
-Sk    kustom symbol.  Append <name>/size, and we will look for a defi-
       nition  file  called  <name>.def in (1) the current directory or
       (2) in ~/.gmt or (3) in  $GMT_SHAREDIR/custom.   The  symbol  as
       defined  in  that  file  is of size 1.0 by default; the appended
       size will scale symbol accordingly.  Users  may  add  their  own
       custom *.def files; see CUSTOM SYMBOLS below.
-Sk に <name> と size を「/」で区切って指定すると, <name>.def という定義ファイルにしたがって,size の大きさのシンボルをプロットするようだ. 定義ファイル <name>.def は,
の順に探されるとのこと. 定義ファイルの書き方は CUSTOM SYMBOLS の項を見るように書いてある. man psxy の下の方に書いてあるので,そちらも読んでみよう.
CUSTOM SYMBOLS
       psxy and psxyz allows users to define and plot their  own  custom  sym-
       bols.  This is done by encoding the symbol using a simple plotting code
       described below.  Put all the plotting codes for your new symbol  in  a
       :
       :
       $GMT_SHAREDIR/custom directory, in that order.  Freeform polygons (made
       up of straight line segments and arcs of circles)  can  be  designed  -
       these  polygons  can be painted and filled with a pattern.  Other stan-
       dard geometric symbols can also be used. Generate freeform polygons  by
       starting with an anchor point (append [ -Wpen ] and [ -Gfill ] to indi-
       cate pen and fill attributes):
            x0   y0   M
       and draw a straight line from the current point to the next point with
            x    y    D
       or add an arc by using
            xc   yc   r    dir1 dir2 A
       When a record other than the D or A  is  encountered,  the  polygon  is
       closed  and  considered  complete.   The  optional pen and fill setting
       :
       :
いろいろ書いてあるが, 今回は簡単に直線で構成された多角形でシンボルを作る方法を解説する.
定義ファイル <name>.def は,xy座標値と命令記号が書かれたテキストファイルである. ここで,xy座標値はプロットする点からの相対値である. 大きさはプロット時に size倍される. 他のシンボルと合わせ,直径 1 の円(-Sc)に内接するように作るのがよいだろう.
多角形を描画する際には,まず始点を指定する必要がある. 座標 (x0, y0) を始点とする場合,
x0 y0 M
と書く.ここから座標 (x1, y1) まで線を引くには,
x1 y1 D
とつづける.線をつづけて引く場合は,
x2 y2 D
x3 y3 D
:
:
xn yn D
とつづけていく. 始点 (x0, y0) と終点 (xn, yn) は一致させなくても, プロット時に多角形は閉じられる.
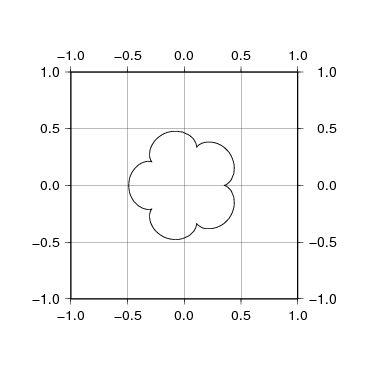
では,実際にやってみよう. 今回は,外サイクロイドでシンボルを作ってみる (参考:サイクロイド - Wikipedia). まずは,外サイクロイドの座標データセットを作る, 以下のような AWKスクリプト epicycloid.awk を書いてみた.
BEGIN{
  for(deg = 0; deg <= 360 * n; deg += 2){
    rad = deg * 3.1415 / 180
    x = (rc + rm) * cos(rad) - rm * cos((rc + rm) / rm * rad)
    y = (rc + rm) * sin(rad) - rm * sin((rc + rm) / rm * rad)
    print x, y
  }
}
このスクリプトには,-vオプションで,
を指定する必要がある. rc:rm = 5:1 の外サイクロイドのデータを作って描画してみよう.
$ awk -v rc=0.35 -v rm=0.07 -v n=1 -f epicycloid.awk > epicycloid.txt
$ cat epicycloid.txt
0.35 0
0.351274 0.000103961
0.355028 0.000826081
0.361067 0.00275675
:
:
$ psxy epicycloid.txt -Jx4 -R-1/1/-1/1 -W3 -Ba0.5g0.5 > epicycloid.eps

この形のシンボルを作るには,1行目に「M」,2行目以降に「D」を付して, 〜.def というファイルに保存すればよい. AWK を使えば簡単である.
$ awk 'NR==1{print $0, "M"}NR>1{print $0, "D"}' epicycloid.txt > epicycloid.def
$ head epicycloid.def
0.35 0 M
0.351274 0.000103961 D
0.355028 0.000826081 D
0.361067 0.00275675 D
0.369072 0.00643201 D
0.378618 0.0123094 D
0.389189 0.0207472 D
0.400205 0.031988 D
0.411044 0.0461475 D
0.421072 0.0632083 D
出きあがったシンボルを描画してみよう.
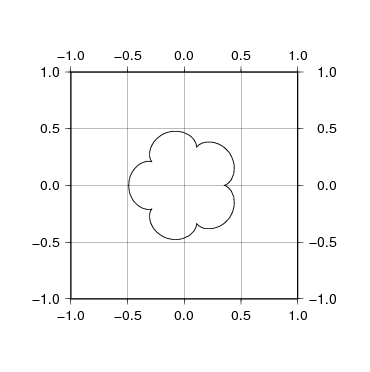
$ echo 0 0 | psxy -Jx4 -R-1/1/-1/1 -Skepicycloid/4 -W3 -Ba0.5g0.5 > epicycloid.eps

おお,ちゃんと外サイクロイドの形になっている.
では,さっそく今作ったオリジナルのシンボルを,実際のプロットに使ってみよう.
$ awk 'BEGIN{for(deg=0; deg<=720; deg+=30){rad=deg*3.1415/180; print rad-sin(rad), 1-cos(rad), deg%360}}' > cycloid.txt
$ makecpt -Ccyclic -Z > c.cpt
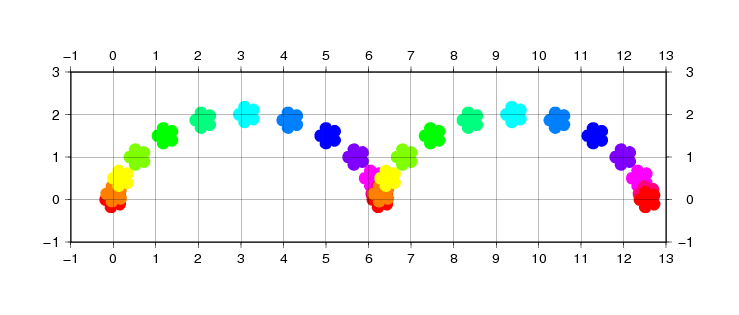
$ psxy cycloid.txt -Jx1.5 -R-1/13/-1/3 -Skepicycloid/1 -Cc.cpt -Ba1g1 > cycloid.eps

外サイクロイドのシンボルで,サイクロイドをプロットしてみた. ここしばらく,モノクロの地図がつづいたので,ちょっとカラフルな図にしてみた.
[ KDOホームにもどる] [ いちからはじめる GMT インデックスにもどる ]
(C) 2011 KDO